The August 2011 Daring Bakers’ Challenge was hosted by Lisa of Parsley, Sage, Desserts and Line Drive and Mandy of What the Fruitcake?!. These two sugar mavens challenged us to make sinfully delicious candies! This was a special challenge for the Daring Bakers because the good folks athttp://www.chocoley.com offered an amazing prize for the winner of the most creative and delicious candy!
The challenge provided lot of recipes for chocolate and non-chocolate candies but being a chocolate lover, I had to try the chocolate ones. This involved tempering chocolate – a quite hi-tech word but in reality quite simple. Chocolate tempering is the process of melting chocolate in a special way such that the temperature of the chocolate remains under control. This as opposed to ‘just melting’ method results in a high quality chocolate that not only has a wonderful mouth feel but great snap when broken and shiny look simulating all three senses. Pure indulgence. The reason is quite complicated but in one simple word ‘chemical’.


Tempering Ranges:
Celsius
Dark: 45°C-50°C > 27°C > 32°C
Milk: 45°C > 27°C > 30°C
White: 45°C > 27°C > 29°C
Fahrenheit
Dark: 113°F-122°F > 80.6°F > 89.6°F
Milk: 113°F > 80.6°F > 86°F
White: 113°F > 80.6°F > 84.2°F
Chocolate is melted and heated until it reaches 45°C / 113°F. Tempered un-melted chocolate is then stirred and melted in until it brings the temperature down to 27°C/80.6°F. It is then put back over heat and brought up to its working temperature of 32°C/30°C/29°C /// 89.6°F/86°F/84.2°F depending on the chocolate you’re using. It is now ready for using in molds, dipping and coating.
• Finely chop chocolate if in bar/slab form (about the size of almonds).
• Place about ⅔ of the chocolate in a heatproof bowl
• Set aside ⅓ of the chocolate pieces
• Place bowl over a saucepan of simmering water (make sure the bowl does not touch the water)
Tip: Make sure that your bowl fits snuggly into the saucepan so that there’s no chance of steam forming droplets that may fall into your chocolate. If water gets into your chocolate it will seize!
• Using a rubber spatula, gently stir the chocolate so that it melts evenly
• Once it’s melted, keep an eye on the thermometer, as soon as it reaches 45°C / 113°F remove from heat (between 45°C-50°C / 113°F-122°F for dark chocolate)
• Add small amounts of the remaining ⅓ un-melted chocolate (seeds) and stir in to melt
• Continue to add small additions of chocolate until you’ve brought the chocolate down to 27°C/80.6°F (You can bring the dark chocolate down to between 80°F and 82°F)
• Put it back on the double boiler and bring the temperature back up until it reaches its working temperature of the chocolate (milk, dark or white) as seen in the above chart. (32°C/89.6°F for dark, 30°C/86°F for milk and 29°C/84.2°F for white)
• If you still have a few un-melted bits of chocolate, put the bowl back over the simmering water, stirring gently and watching the thermometer constantly.
• IMPORTANT: You really need to keep an eye on the temperature so that it doesn’t go over its working temperature
 It’s now tempered and ready to use.
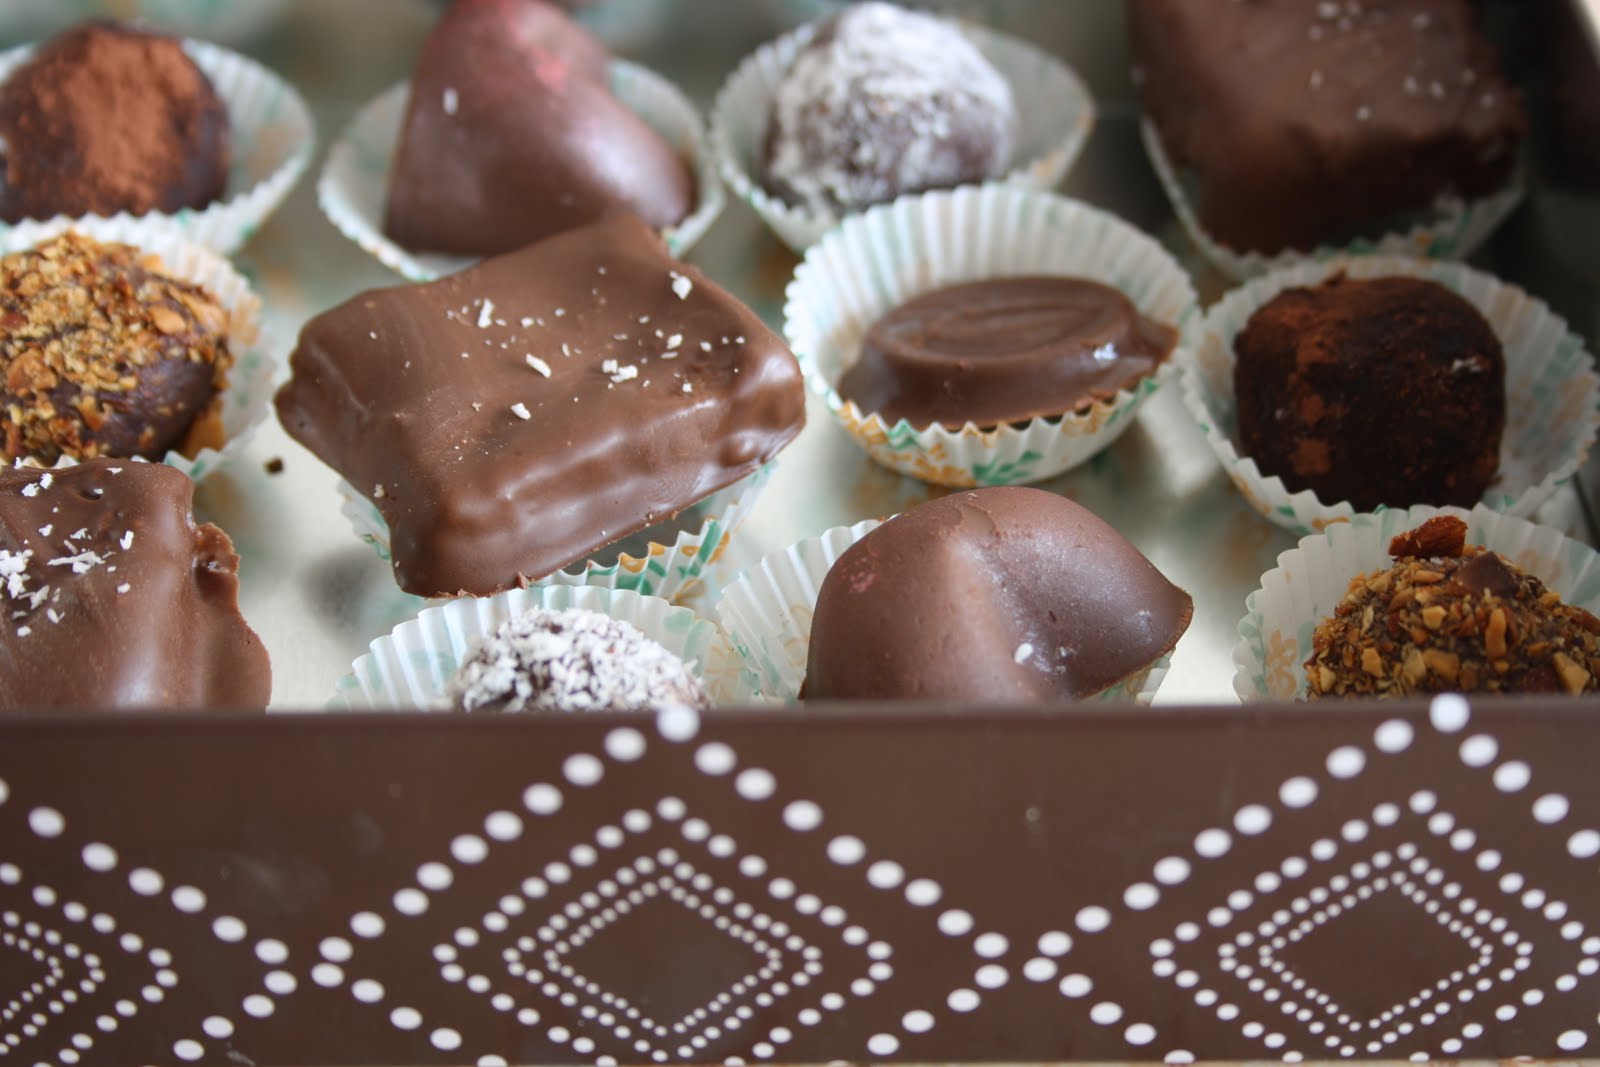
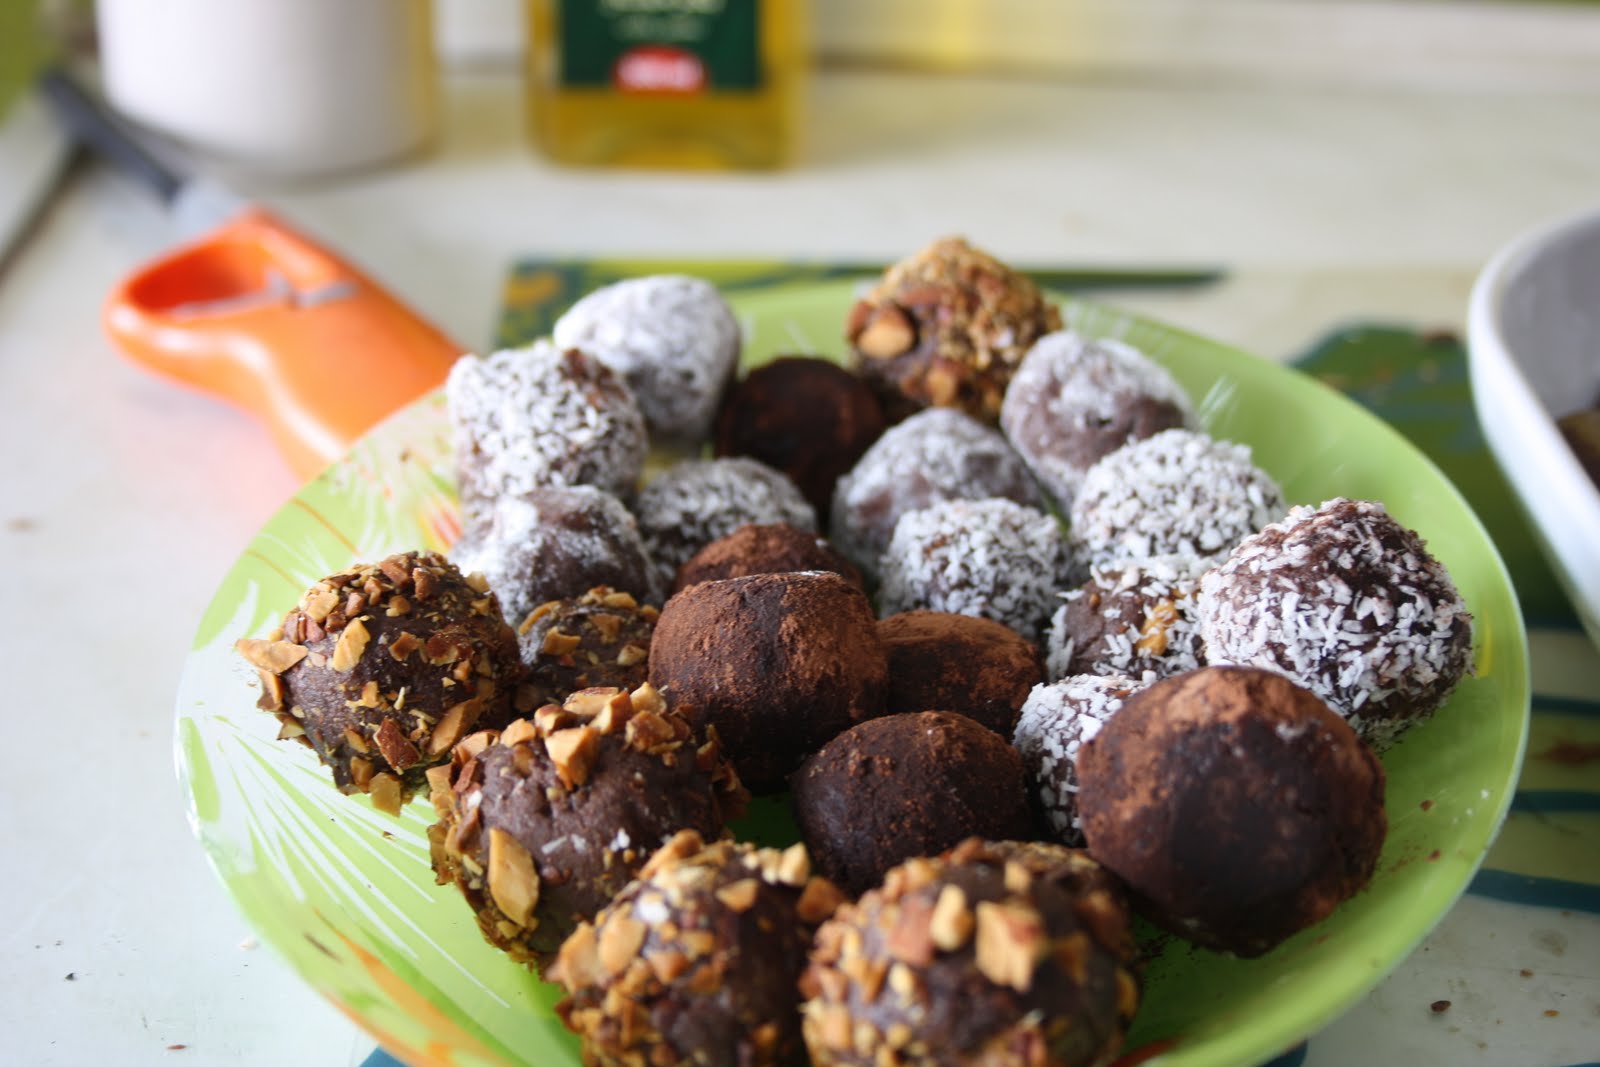
Milk Chocolate Almond Praline Truffles
Servings: Makes +- 30 truffles, recipe easily doubled or halved
Adapted from the Cook’s Academy Curriculum, Dublin
Active Time: 1 – 2hrs
Ganache Setting Time: 2 – 4hrs or Overnight
Praline Ingredients:
½ cup (2 oz/60 gm) almonds
½ cup (4 oz/115 gm) granulated white sugar
2 tablespoons (30 ml) water
Making the praline and ganache. Once set, making balls of the set ganache then rolling in crushed almonds
Directions:
1. Preheat oven to moderate 180°C / 160°C Fan Assisted (convection oven); 350°F / 320°F convection / Gas Mark 4
2. Place whole almonds on a non-stick baking tray and dry roast for 10mins
3. Allow to cool
4. Line a baking tray with parchment paper or a silicon mat
5. Place the almonds onto the prepared tray
6. Combine the sugar and water in a saucepan over medium low heat, stirring until the sugar is dissolved
7. Turn the heat up and bring to the boil (do not stir), brushing down the sides of the pot with a pastry brush dipped in water to remove any sugar crystals
8. Boil until the mixture turns amber (160°C – 170°C / 320°F- 340°F on a candy thermometer)
9. Remove from heat immediately and pour the syrup over the almonds
11. Allow to cool completely
12. Break into small pieces
13. Transfer pieces to a food processor and process until desired texture, either fine or rough
14. Set aside
Ganache Ingredients
1¾ cup (9 oz. / 255 g) Milk chocolate, finely chopped
½ cup (4 oz. / 125 ml) Double/Heavy Cream (36% – 46% butterfat content)½ – 1 cup Crushed or Ground Roasted almonds for coating
Directions:
1. Finely chop the milk chocolate
2. Place into a heatproof medium sized bowl
3. Heat cream in a saucepan until just about to boil
4. Pour the cream over the chocolate and stir gently until smooth and melted
5. Allow to cool slightly, about 10 minutes
6. Stir in the praline
7. Leave to cool and set overnight or for a few hours in the fridge
8. Bring to room temperature to use
Forming the truffles:
1. Using teaspoons or a melon baller, scoop round balls of ganache
2. Roll them between the palms of your hands to round them off
Tip: Handle them as little as possible to avoid melting
Tip: I suggest wearing food safe latex gloves, less messy and slightly less heat from your hands
3. Finish off by rolling the truffle in the crushed roasted almonds
Tip: You can also roll them in almond praline
4. Place on parchment paper and leave to set
Tip: They look great when put into small petit four cases and boxed up as a gift!

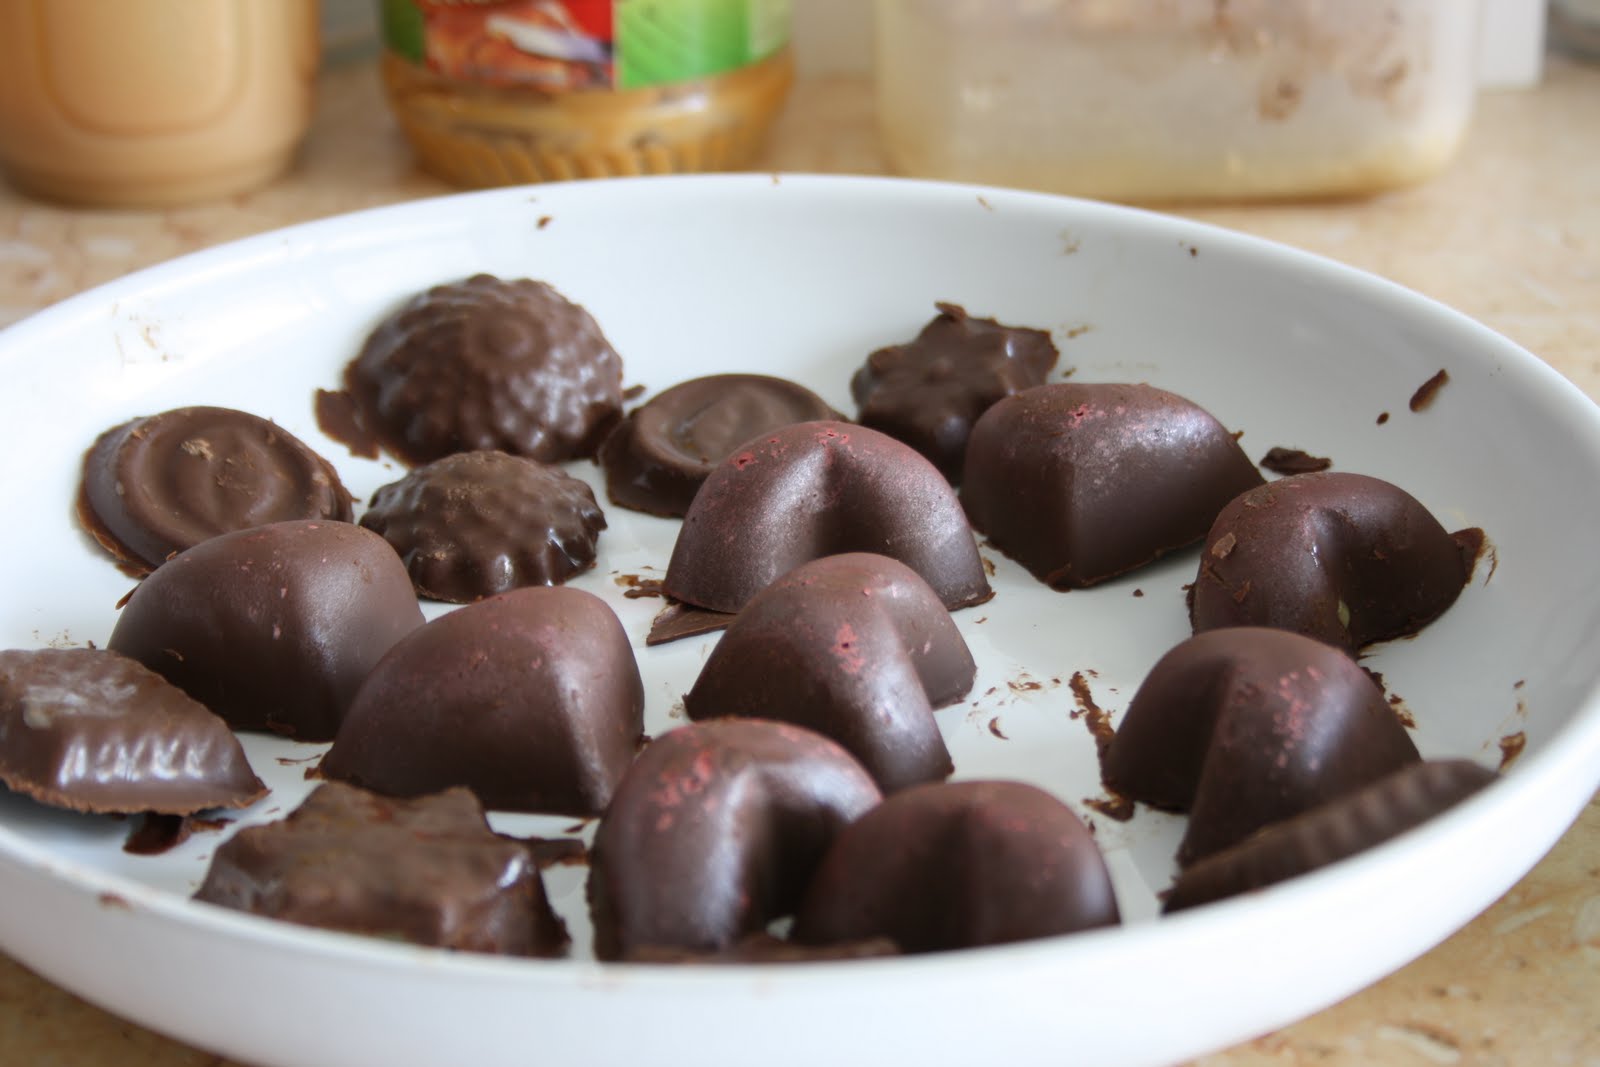
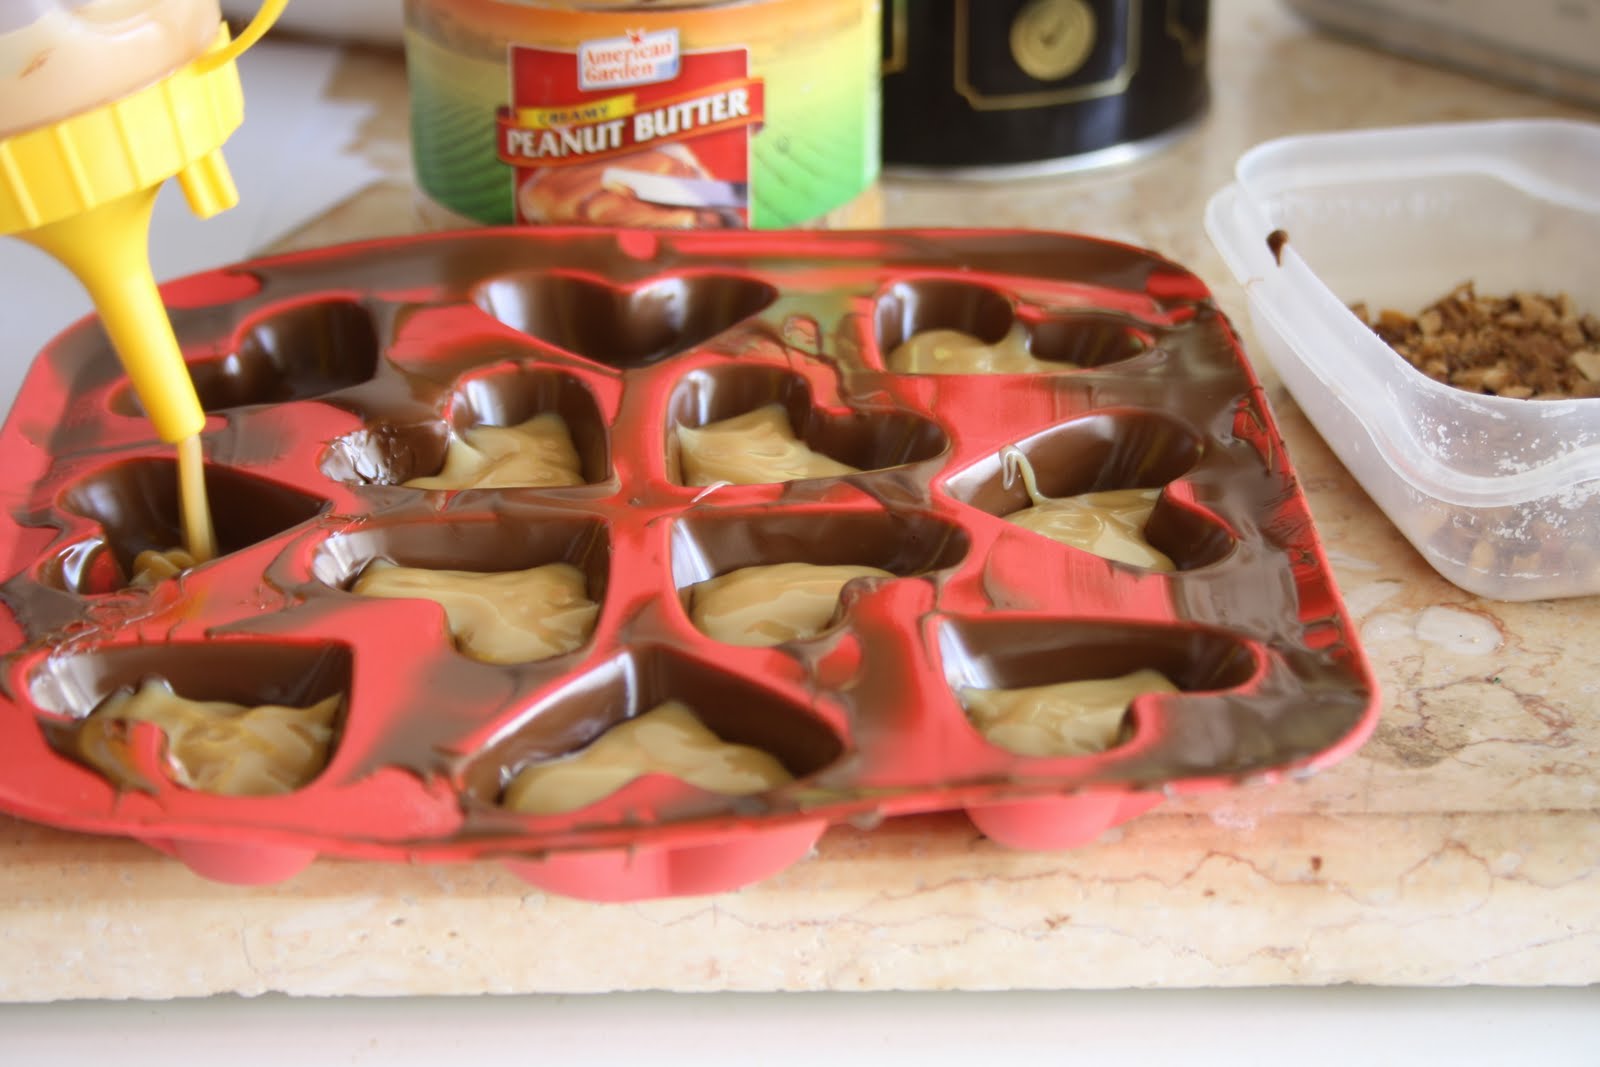
Deluce le Leche Chocolates aka Bonbons
Ingredients
Dark or milk chocolate melted, preferably tempered, about 5 ounces
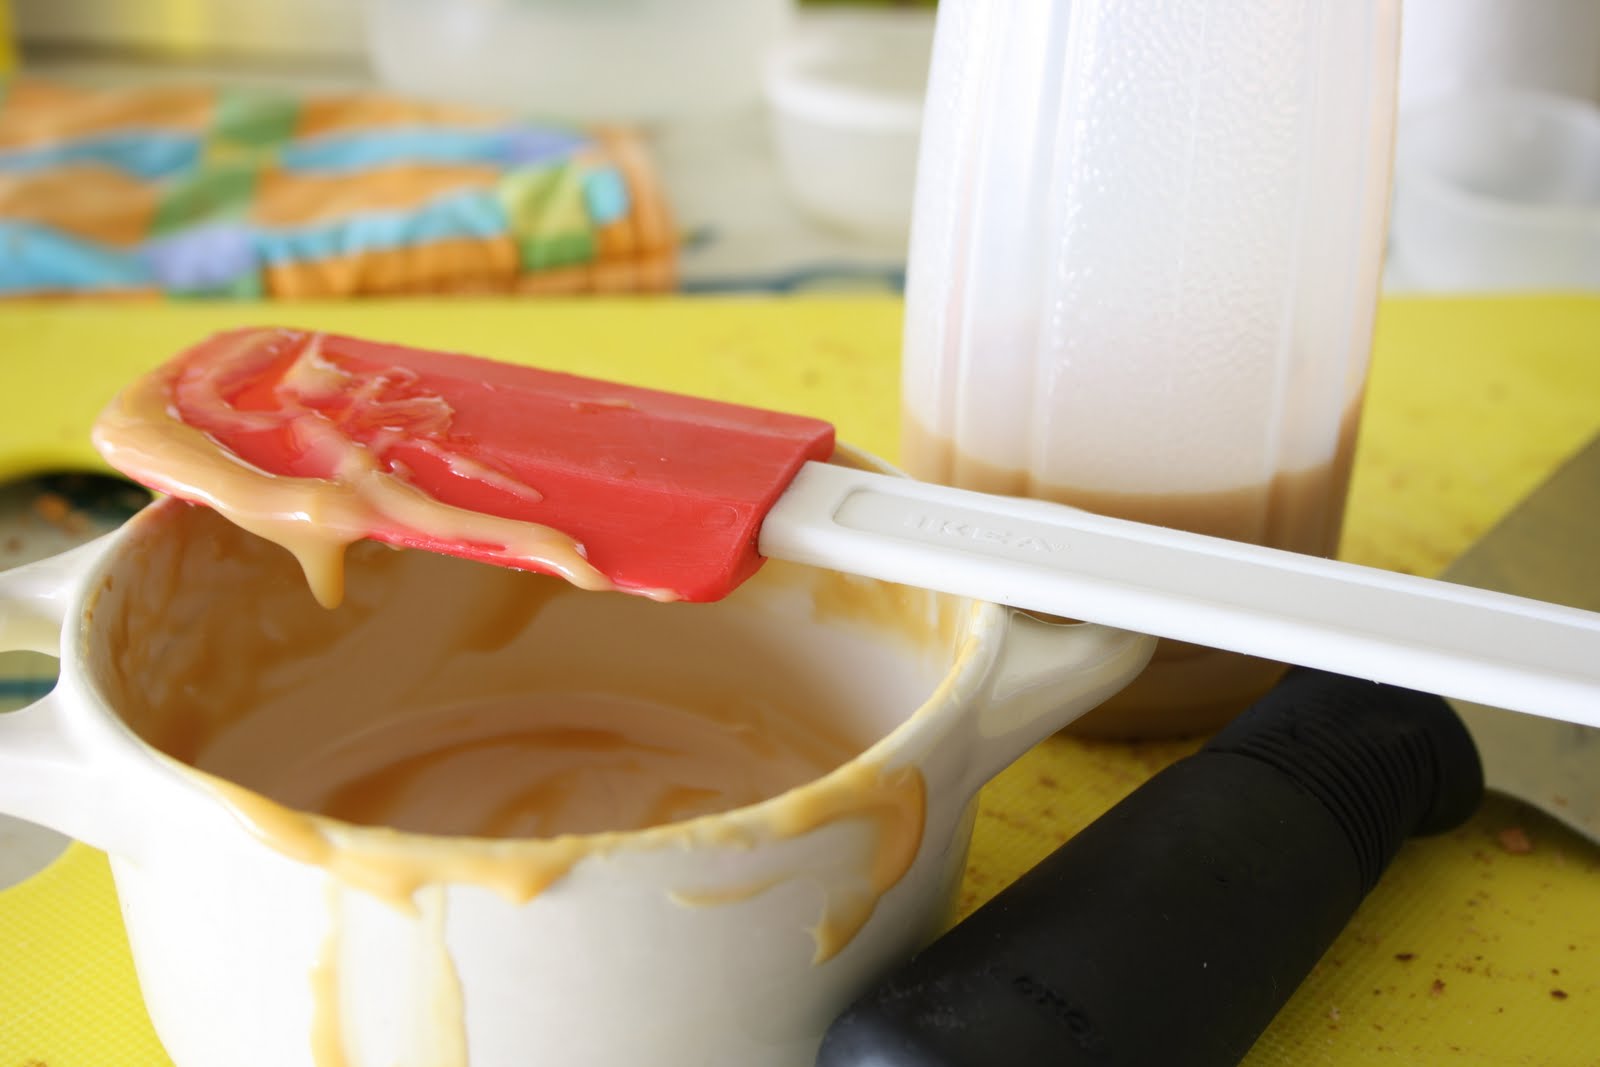
Home made deulce de leche (Source:
http://www.bakersroyale.com/basic-baking-series/baking-basics-how-to-make-homemade-dulce-de-leche/ )
Equipment
2 or 3 quart, heavy-bottomed pot
Candy thermometer
Whisk
Paint the moulds with lustre dust if you wish.
Directions:
2. Place the covered dish in a larger roasting or casserole pan and fill it up with water until it reaches three quarters of the up the covered dish to create a water bath.
3. Bake at 425 degrees F for 60-90 minutes checking every 30minutes on the water level and adding more as needed.
4. Dulce de leche is ready when it takes on a brown and caramel-like appearance. Remove from the oven and whisk to smoothness. Let cool before storing.
5. Coat the molds with chocolate using the method mentioned above. You can either paint the moulds with chocolate or pour the chocolate withe ladle and then empty the contents, cleaning the surface of the mould by rubber scraper such that only mould wells remain coated with chocolate.
6. Fill chocolate coated molds with prepared filling. You can use a spoon or through a squeeze bottle.
7. Finish off with a layer of chocolate.
8. Once fully set, carefully knock the chocolates out of the mold
Tempered Chocolate
Coconut squares
For Coconut Squares
50 gm butter
1/2 cup granulated sugar
1/2 tsp powdered cardamom (optional)
1/4 tsp salt
2 1/2 cups desiccated coconut
Method:
1. Place the cream, butter and sugar in a saucepan and slowly bring to a boil, stirring to dissolve the sugar.
6. Dip each square in tempered chocolate and place on parchment lined baking sheet. Chill until set and cut the feet for finished look.
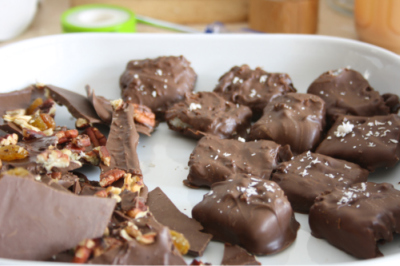
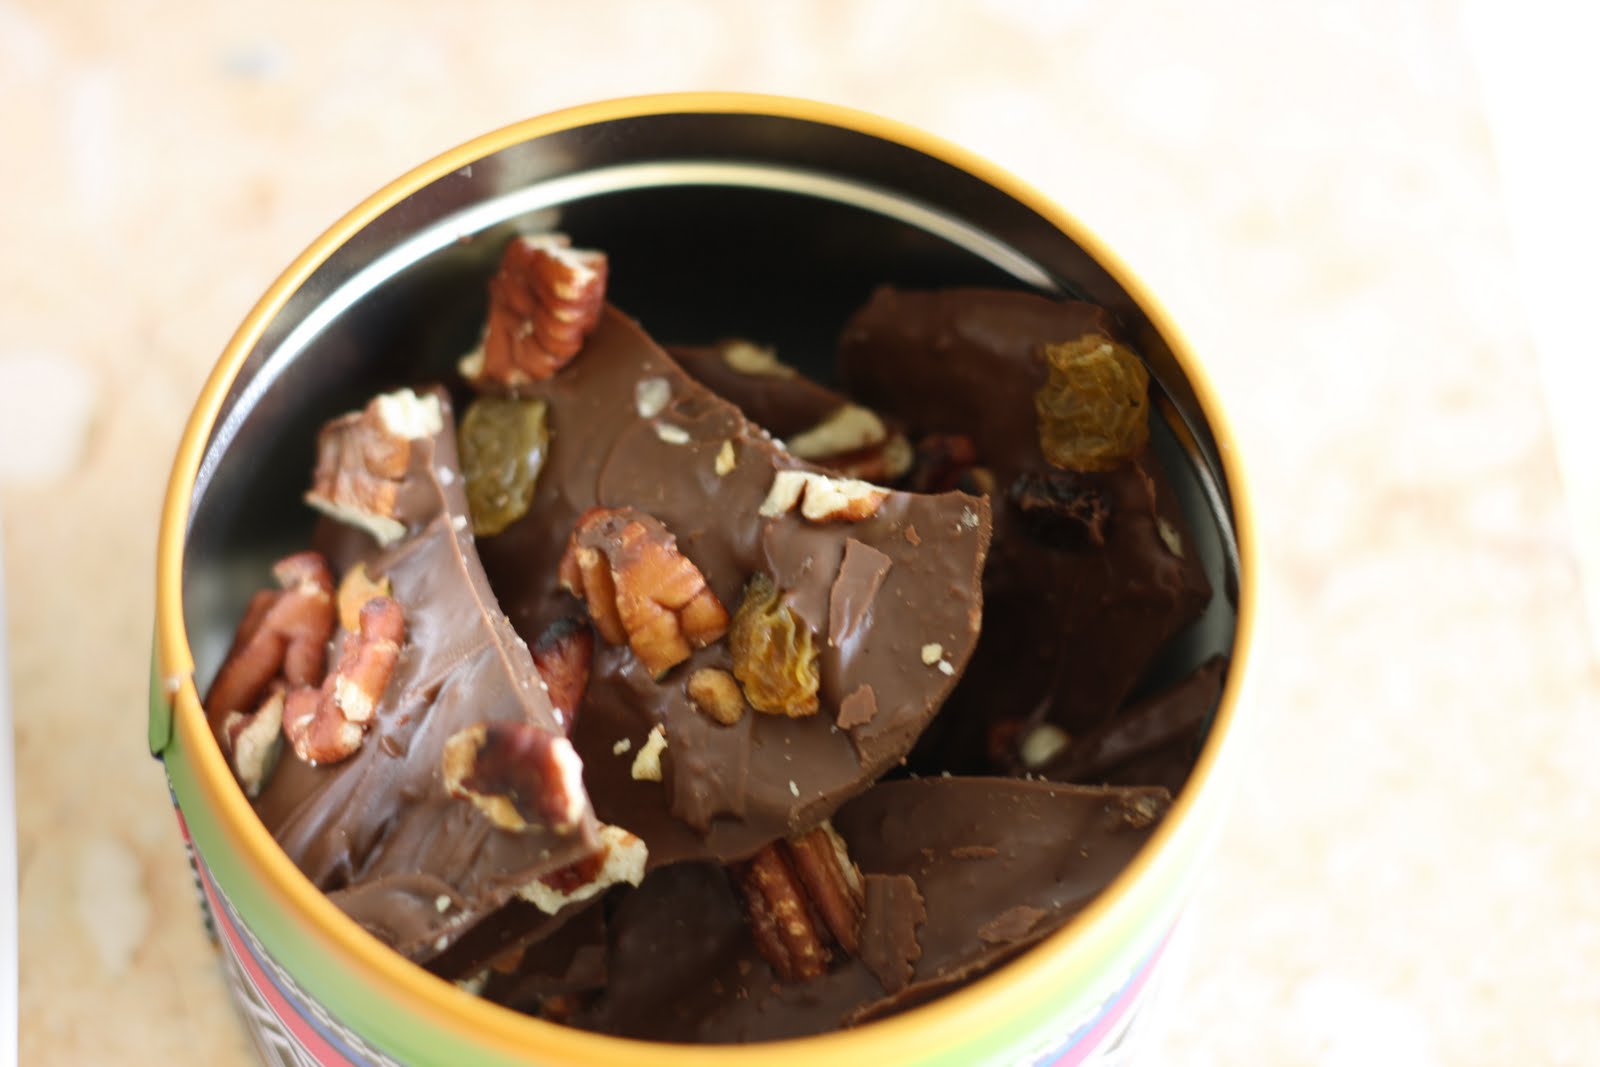
Chocolate Bark (Base Recipe)
Chocolate bark is really fun and easy to make (kids love making this stuff!). You can also decorate it with almost anything you like, nuts, dried fruits, seeds, crushed candies, honeycomb etc. The whole idea of chocolate bark is that it’s rough in texture and look, just like bark. You can cut it in neat squares, or my favorite, break it up in rough pieces. It’s also great to use up left over tempered chocolate, either plain or if you’ve mixed in crushed nuts to use for coating truffles.
Ingredients
Milk/Dark/White Chocolate, tempered (any amount)
Various nuts, seeds, candies, dried fruits or anything you like in any quantity you like, I used roasted pecans and raisins.
1. Line a baking tray with parchment paper
2. Temper your chocolate using your preferred method
3. Once tempered, spread the chocolate over the parchment paper
4. Sprinkle your ingredients over the chocolate
5. Leave to set
Tip: To help speed up the setting, you can put it in the fridge for about 15-30min. Don’t leave it in the fridge to avoid the chocolate from sweating (water droplets will form on the chocolate)
6. Either break or cut into pieces
7. Store at room temperature in an airtight container


Thanks for taking part in the challenge, it looks like you had a great time doing it 🙂
thanks mandy for the challenge, it was the best challenge 🙂
Wow, you really worked hard on this challenge! I thought I was full of chocolate after mine, but I could go for some of those beautiful truffles of yours 🙂
I too have been missing from the Daring Bakers scene! Ever since I moved.. I must get back into the swing of it! These look great!
THANKS everyone ":)