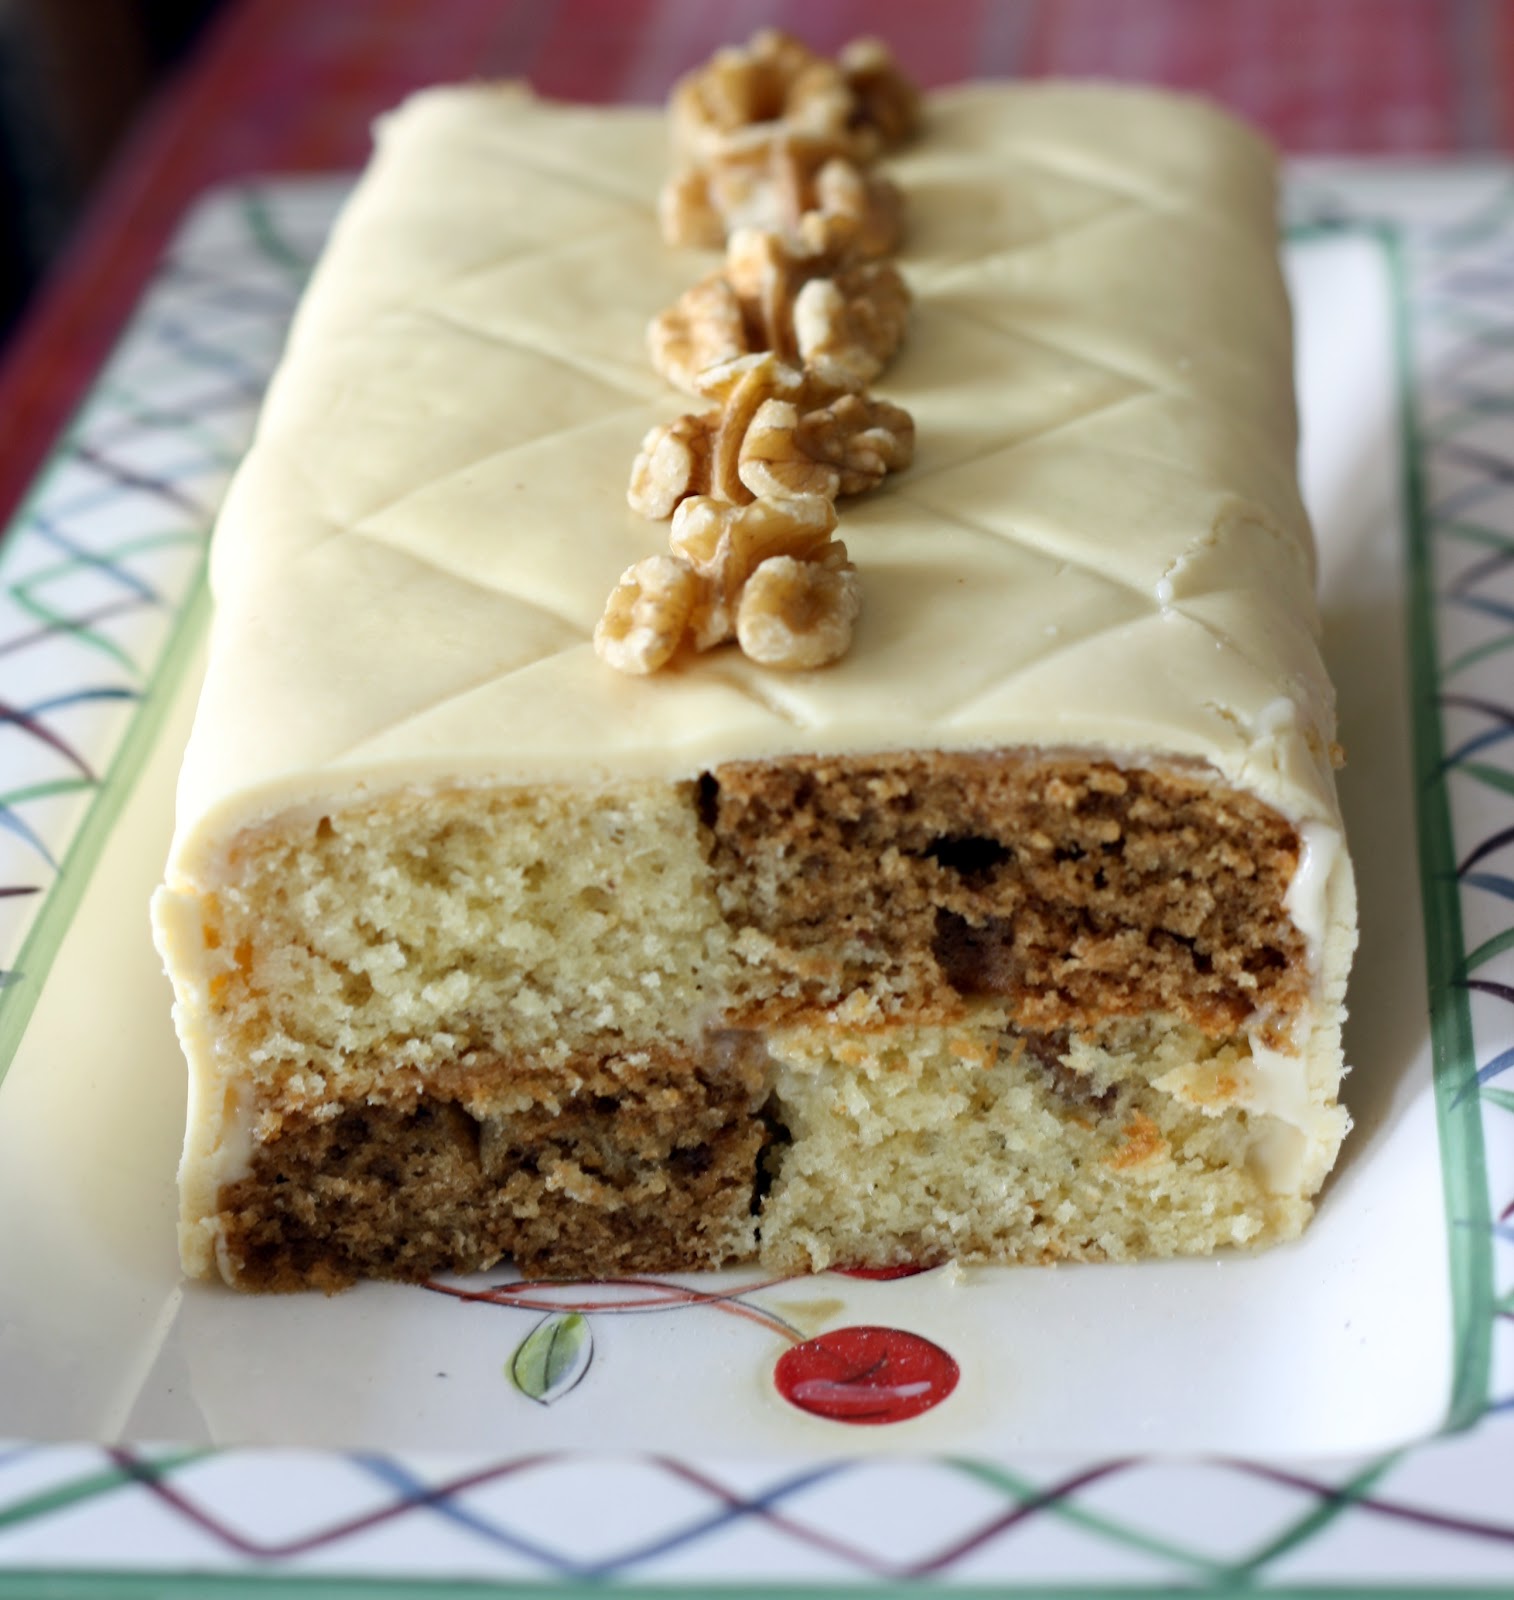
I have been part of Daring Bakers for a while now and though on and off, I try to participate in all the challenges. They are a great source of learning for novice or advance bakers.A few months back one of my cousins posted a picture of 9 cubes Battenberg and asked if I have ever tried this. This challenge with similar cake came at the right time and it was relatively easy challenge but with fantastic results.
First the blog checking lines:
Mandy of What The Fruitcake?! came to our rescue last minute to present us with the Battenberg Cake challenge! She highlighted Mary Berry’s techniques and recipes to allow us to create this unique little cake with ease.

Coffee and Walnut Battenberg:
Servings: +- 8
Ingredients
¾ cup (1½ sticks) 175gm / 6 oz Unsalted Butter, softened & cut in cubes
¾ cup / 175gm / 6 oz Caster Sugar
1¼ cups / 175gm / 6 oz Self-Raising Flour (***see end of doc on how to make your own)
3 Large Eggs, room temp
½ cup / 65gm / 2 1/3 oz Ground Almonds (Can be substituted with ground rice)
3/4 tsp / 3½ gm Baking Powder
3 tsp (15 ml) Milk
½ tsp (2½ ml) Vanilla Extract
1½ tsp (7½ ml) 7 gm Instant Coffee Powder or Granules
3 Tbsp / 25gm / 1 oz Walnuts, roughly chopped
To Finish
½ cup (1 stick) 115gm /4 oz Unsalted Butter
2 cups / 225gm /8 oz Powdered (Icing/Confectioners’) Sugar
½ tsp / 2 gm Instant Coffee
1½ tsp (7½ ml) Milk or Cream
1 cup / 225gm /8 oz Chocolate Plastic, natural or yellow
Directions:
1. Preheat oven to moderate 350°F/180°C/160°C Fan Assisted/Gas Mark 4
2. Grease an 8”/20cm square baking tin with butter
3. Line the tin with parchment paper, creating a divide in the middle with the parchment (or foil)
4. OR Prepare Battenberg tin by brushing the tin with melted butter and flouring
5. Whisk together dry ingredients (except walnuts and coffee) and combine with the wet ingredients in a large bowl (except vanilla and milk) and beat together just until the ingredients are combined and the batter is smooth
6. Spoon half the mixture into a separate bowl and stir in the vanilla, 1½ teaspoons milk and chopped walnuts
7. Spoon the walnut mixture into the one side of the prepared baking tin
8. Dissolve the coffee in the remaining 1½ teaspoon milk and add to the remaining batter, stir until just combined
9. Spoon the coffee batter into the other half of the prepared baking tin
10. Smooth the surface of the batter with a spatula, making sure batter is in each corner
11. Bake for 25-30mins until the cake is well risen, springs back when lightly touched and a
toothpick comes out clean (it should shrink away from the sides of the pan)
12. Leave to cool in the tin for a few minutes before turning out to cool thoroughly on a wire rack
13. Once completely cool, trim the edges of the cake with a long serrated knife
14. Cut each sponge in half lengthways so that you are left with four long strips of sponge
15. Neaten the strips and trim as necessary so that your checkered pattern is as neat and even as possible
16. Combine the buttercream ingredients together and mix until combined
17. Spread a thin layer of buttercream onto the strips of cake to stick the cake together in a checkered pattern (one yellow next to one pink. On top of that, one pink next to one yellow)
18. Dust a large flat surface with icing sugar then roll the marzipan/chocolate plastic/fondant in an oblong shape that is wide enough to cover the length of the cake and long enough to completely wrap the cake
19. Spread the top of the cake with a thin layer of buttercream
20. Place the cake on the marzipan, buttercream side down
21. Spread buttercream onto the remaining three sides
22. Press the marzipan around the cake, making sure the join is either neatly in the one corner, or will be underneath the cake once turned over
23. Carefully flip the cake over so that the seam is under the cake and score the top of the cake with a knife, you can also crimp the top corners with your fingers to decorate
24. Neaten the ends of the cake and remove excess marzipan by trimming off a small bit of cake on both ends to reveal the pattern
Chocolate Plastique / Modelling Chocolate:
Servings: +- 8
White Chocolate Plastique
200gm /7 oz Good Quality White Chocolate
2 Tbsp / 30ml /1 oz Light Corn Syrup / Glucose Syrup / Golden Syrup
Directions:
1. Melt the chocolate in a double boiler or in a heatproof bowl over a pot of simmering water, stir occasionally
2. Once completely melted, remove from heat and allow to cool a bit
3. Stir in corn syrup / glucose syrup / golden syrup, it will seize up almost immediately, just keep stirring until mixed and it comes away from the side of the bowl
4. Transfer chocolate into a sealable bag, spread the chocolate out then seal the bag
5. Leave overnight or refrigerate for about 2 hours until completely firm
6. Turn out from the bag and knead on a surface dusted with powdered sugar, at first it will just break , but as you knead, it will warm up and start to become pliable
7. Knead until it’s pliable enough to roll out or mould, 5 – 10mins
Storage Instructions/Tips:
– Battenberg will keep for 3-4 days stored at room temperature in an airtight container
– Keep chocolate plastique in an airtight container at room temperature, it will keep for as long as the
expiry date on the chocolate wrapper
Additional Information:
How to make your own self raising flour:
1 cup Self Raising Flour = 1 cup / 115g All Purpose Flour + 1 ½ tsp


your recipie seems to me so interesting 🙂
planing to prepare this on this weekend
but…
I think you forgot to complete the recipie of self raising flour
"1 cup Self Raising Flour = 1 cup / 115g All Purpose Flour + 1 ½ tsp"
what is 1 1/2 tsp????
1 1/2 tsp of baking powder! 🙂
yes naureen is right, thanks for completing 🙂
hi! can you please give the recipe of Fondant?
please check wilton website saima, they have the recipe and its pretty good,
retrovir uk – glycomet 500mg cheap order allopurinol 300mg pills
clozapine over the counter – buy pepcid generic famotidine medication
buy seroquel generic – buy generic eskalith buy eskalith generic
order anafranil pills – celexa order online sinequan generic
cost atarax 25mg – amitriptyline for sale endep 25mg for sale
Ahaa, its good dialogue concerning this paragraph at this place at this web site,
I have read all that, so at this time me also commenting at this place.
Hi are using WordPress for your blog platform? I’m new to the blog world but I’m
trying to get started and set up my own. Do you need any coding expertise to make your own blog?
Any help would be greatly appreciated!
augmentin drug – acillin usa brand ciprofloxacin 500mg
how to buy amoxil – order duricef 250mg online order generic ciprofloxacin 500mg
buy zithromax 250mg – order azithromycin 500mg for sale order ciprofloxacin 500mg online cheap
purchase cleocin generic – clindamycin generic buy chloromycetin online
Thanks for finally talking about > Battenberg for Daring Bakers – Bake Fresh < Liked it!
First of all I want to say superb blog! I had a quick question in which I’d like
to ask if you do not mind. I was interested to know how you center
yourself and clear your thoughts prior to writing.
I’ve had difficulty clearing my thoughts in getting my thoughts out there.
I do enjoy writing but it just seems like the first 10
to 15 minutes are lost simply just trying to figure
out how to begin. Any ideas or tips? Appreciate it!
It’s awesome designed for me to have a website, which is good for my knowledge.
thanks admin
albuterol inhaler – ventolin 4mg us brand theophylline 400mg
methylprednisolone 4mg tablet – buy astelin 10ml nasal spray order azelastine 10 ml nasal spray
desloratadine buy online – order desloratadine generic cost ventolin
buy glyburide 5mg online – actos medication forxiga 10 mg price
glycomet 1000mg over the counter – hyzaar price buy precose without a prescription
buy cheap generic repaglinide – repaglinide uk jardiance 10mg drug
buy semaglutide 14mg – semaglutide 14mg drug DDAVP spray
purchase terbinafine sale – generic grifulvin v cost griseofulvin
top 10 pharmacies in india http://indiaph24.store/# cheapest online pharmacy india
online pharmacy india
buy medicines online in india http://indiaph24.store/# reputable indian online pharmacy
reputable indian online pharmacy
ketoconazole 200 mg drug – order butenafine for sale sporanox cheap
india pharmacy http://indiaph24.store/# Online medicine order
п»їlegitimate online pharmacies india
http://indiaph24.store/# world pharmacy india
reputable canadian pharmacy [url=https://canadaph24.pro/#]Licensed Canadian Pharmacy[/url] best canadian pharmacy
buy famciclovir 250mg – buy famvir 250mg buy generic valaciclovir 500mg
mexican pharmaceuticals online: cheapest mexico drugs – mexican pharmacy